

Until further notice Elementary teachers will use MakeMusic Cloud only for in-class demonstration and do not need to create classes or roster students. Elementary teachers only need to connect to their MakeMusic Cloud Platform and follow steps 1-3.
-
All Teachers: Connecting to MakeMusic Cloud Platform
-
Secondary Teachers Only: Creating Classes in MakeMusic Cloud
-
Secondary Teachers Only: Rostering Students into MakeMusic Cloud
- Additional MakeMusic Cloud Support Resources
Connecting to the MakeMusic Cloud Platform
- Install the MakeMusic Cloud (MMC) app from the LMS App Center to each of your courses in Schoology.
- Secondary Teachers: Launch the app from any Schoology course page to access MakeMusic Cloud via single sign-on.
Elementary Teachers: Launch MakeMusic Cloud from the AEB Music Teachers Schoology Group.
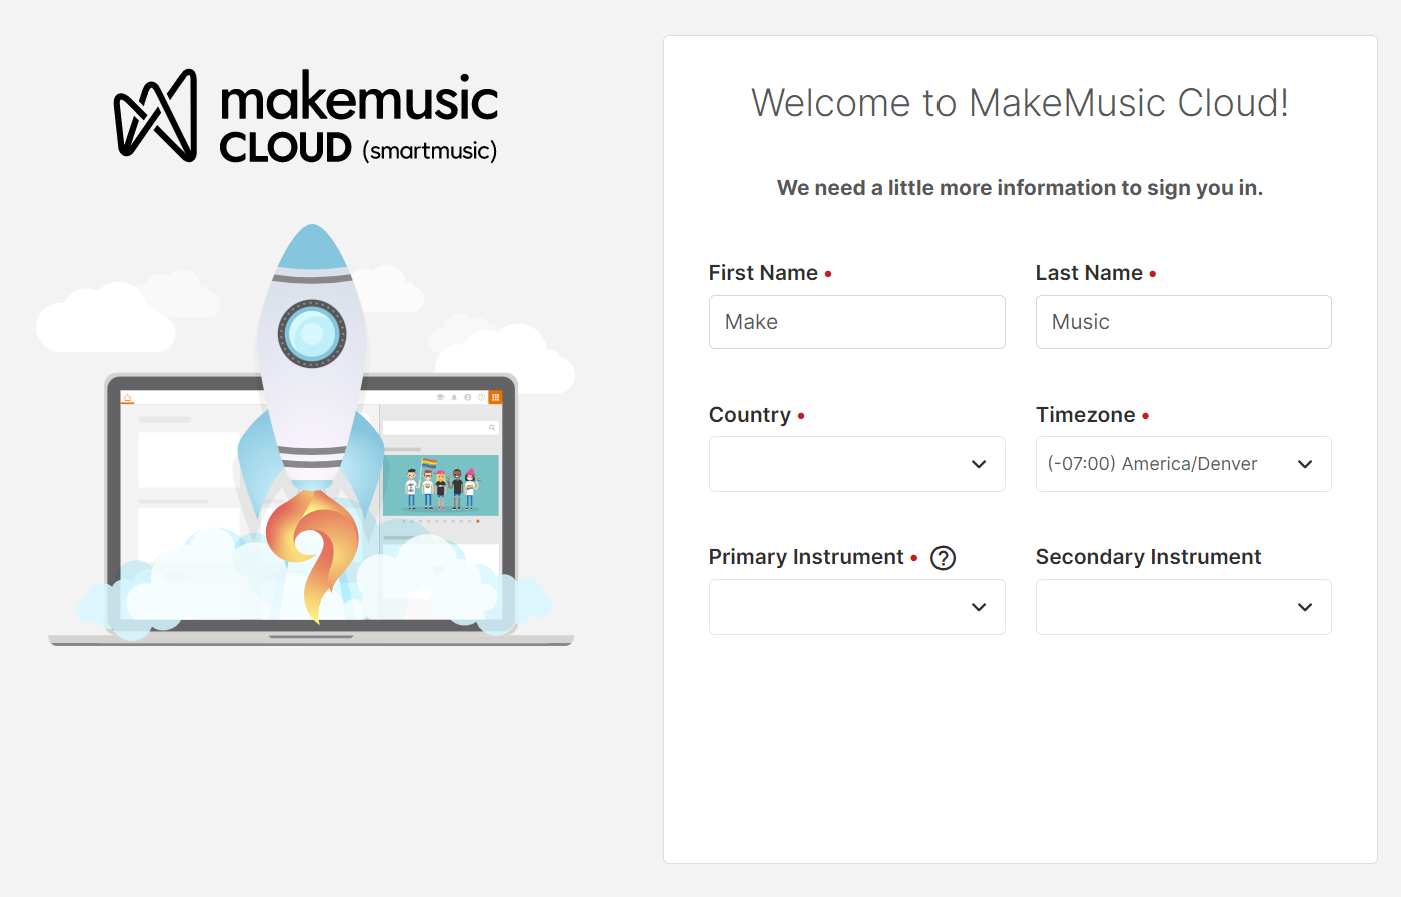
- Teachers without an existing MMC account will see this screen to create their account:
- Teachers with an existing MMC account will see this screen and type the temporary password provided to you within the MakeMusic Cloud Resource Folder in your respective Schoology groups:
- Teachers without an existing MMC account will see this screen to create their account:

- Connecting to Platform
- If you are new to using MakeMusic Cloud at your current school, click Accept to connect to your MMC platform (a.k.a. organization). Accepting this invitation will allocate a paid teacher subscription to your account, which will allow you to create classes.
- Teachers with existing accounts will be taken directly to their MMC home page and are automatically granted a paid teacher subscription, which will allow you to create classes.
- If you see multiple invitations on this page, please visit https://account.makemusic.com/invites to accept the remaining invitations.
- Until further notice Elementary teachers will use MakeMusic Cloud only for in-class demonstration. Elementary teachers should stop here once they've connected to their platform.
- If you are new to using MakeMusic Cloud at your current school, click Accept to connect to your MMC platform (a.k.a. organization). Accepting this invitation will allocate a paid teacher subscription to your account, which will allow you to create classes.

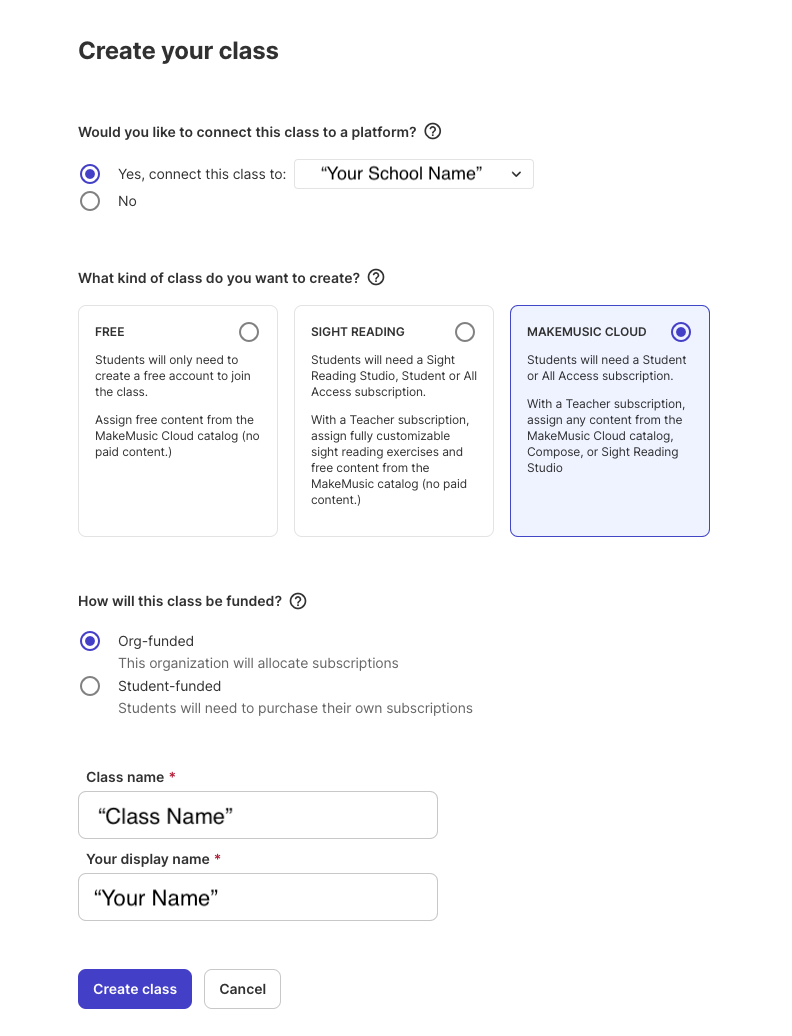
Creating Classes in MakeMusic Cloud
Teachers returning to MakeMusic Cloud (formerly SmartMusic) are advised to archive any remaining classes from previous years and create new ones. For more information, please see Archiving a Class.
- From the left navigation menu, select Create class.
- Select the parameters below:
- Click Create class. The Class Details page appears.

Rostering Students into MakeMusic Cloud
These steps do not apply to courses in Schoology with linked and sectioned classes, please reach out to your supervisor or LAUSD Help Center for further assistance.
- Open your desired course within Schoology and launch the MMC app. Your MMC home page appears.
- From the left navigation menu, select Admin.
- On the Admin page, select Classes from the top menu.
- Select the MMC class that corresponds to the Schoology course from step 1.
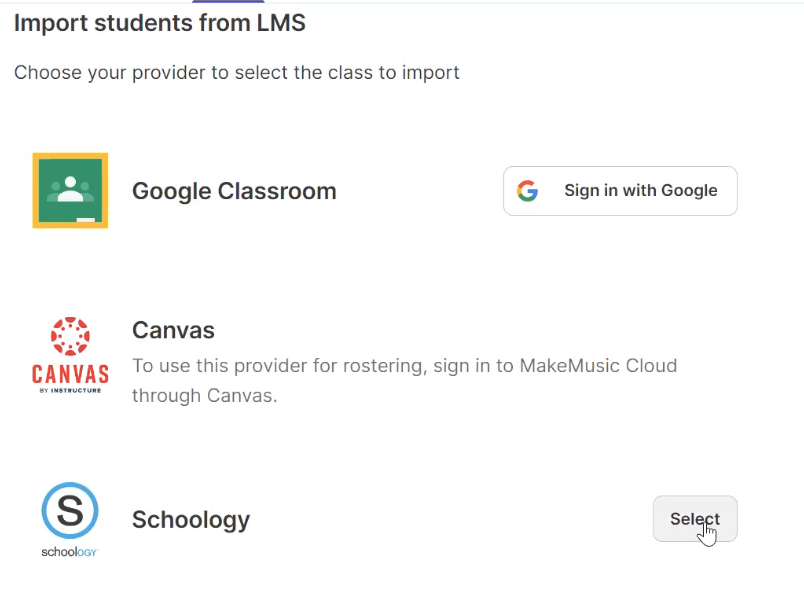
- Click the Add students button and select Import students from the menu. A dialog box appears.
- Click Select next to Schoology.

- The list of students appears. Select ‘No, I will provide my own instructions for them to log in through our LMS’ and click Invite Students. The students are added to your MMC class.
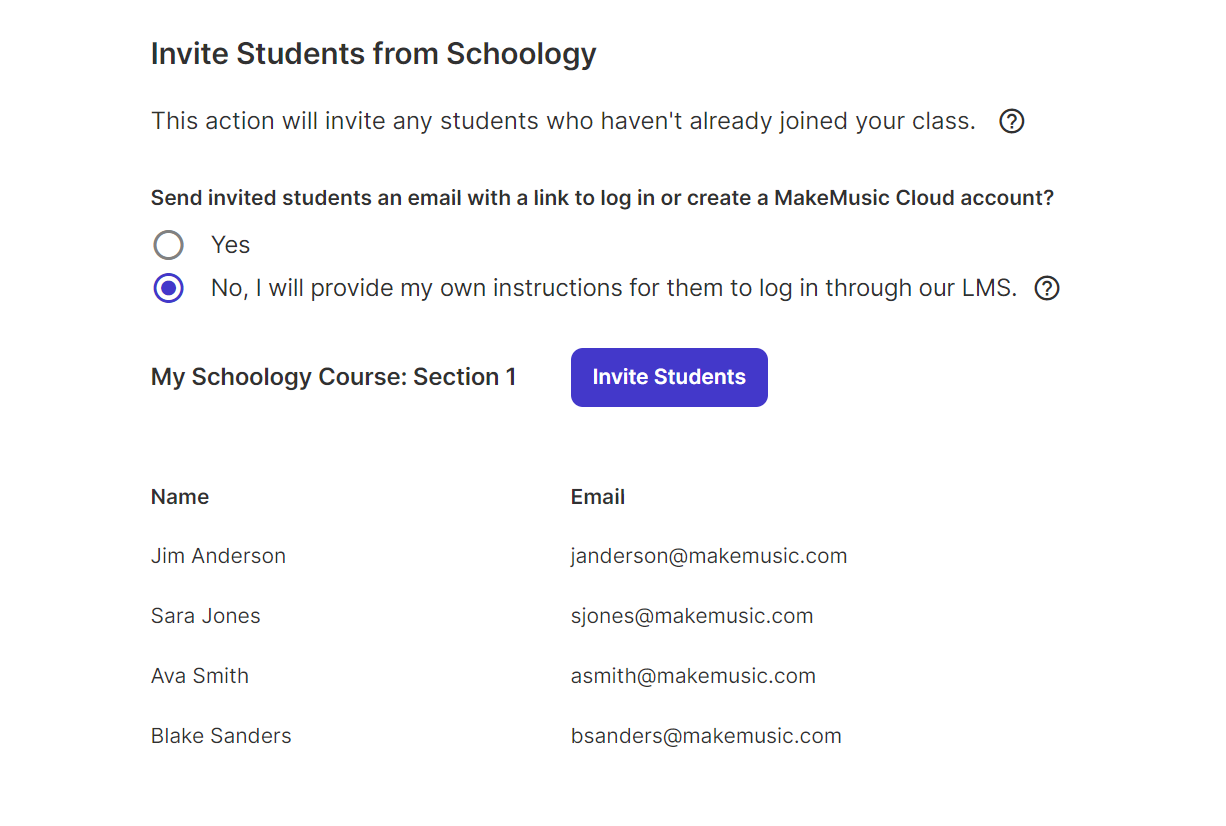
- The Class Details page appears with a confirmation message in the upper right saying that students have been added to the class. All LAUSD student accounts from prior years have been deleted, so all students will appear under the Invited tab for now. When students log in for the first time, they will accept the pending invitation to join your class during their first log in.

- Repeat this process for each MMC class. If you wish to roster students from a different Schoology course, return to Schoology and launch MMC from the course you wish to roster.
Additional MakeMusic Cloud Support Resources:
- www.makemusic.com/lausd
-
LAUSD Support Line: 213-474-7144
- Phone Hours
- Monday through Thursday 6:30 AM – 5:00 PM Pacific
- Friday 6:30 AM – 4:00 PM Pacifics
0 Comments