

After you have created your class, you can create a Grading Scale for that class. A Grading Scale is used to match grade names (A-, B, etc.) to a point percentage. When you grade MakeMusic Cloud assignments, the percentage of points achieved by a student is calculated, and then the corresponding grade label that you’ve specified for that percentage within the Grading Scale is applied. Students reviewing their graded assignments see an overall grade from your Grading Scale for their individual assignments.
It is recommended that a Grading Scale is added to a class before new assignments are created, but the scale can also be added or edited at any time. Grading Scales are customizable, and can be created to fit the grading scale used in your school, or the specific feedback needs of the students within a certain class. Once a Grading Scale has been created for one of your classes, it can easily be used for another.
Jump to:
- Step 1: select Class Tools from the Navigation Menu or Gradebook.
- Step 2: enter a name for your Grading Scale.
- Step 3: define each grade label for your Grading Scale.
- Step 4: save your Grading Scale.
- Step 5 (Optional): use an existing Grading Scale for another class.
- Step 6 (Optional): use a predefined Grading Scale.
Step 1: select Class Tools from the Navigation Menu or Gradebook.
To create a Grading Scale, select the Navigation Icon ![]() and choose Class Tools. Then select Grading Scale.
and choose Class Tools. Then select Grading Scale.
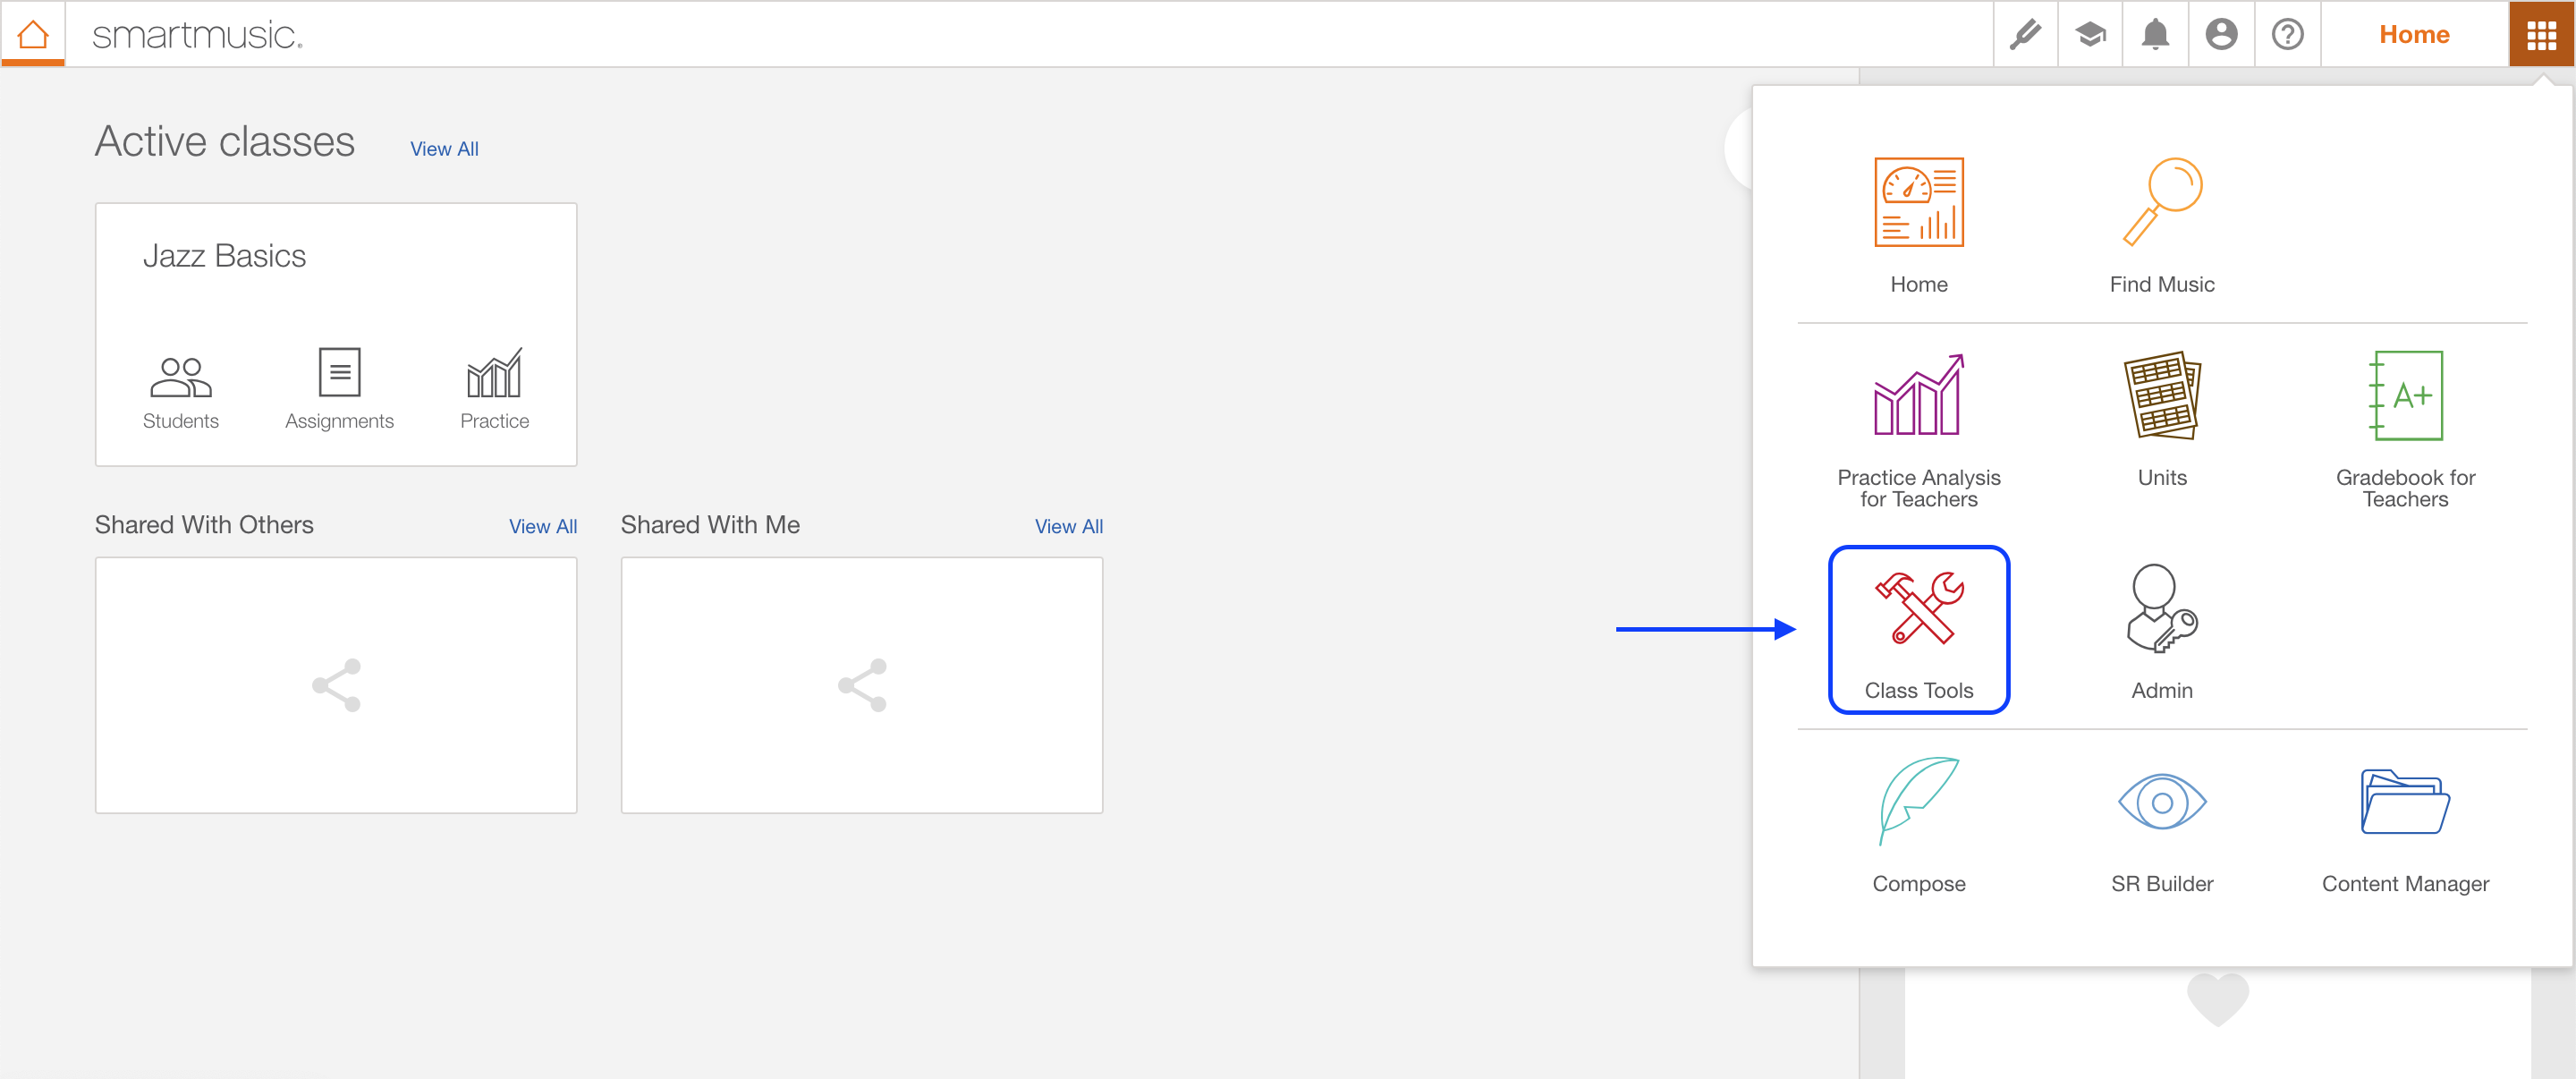
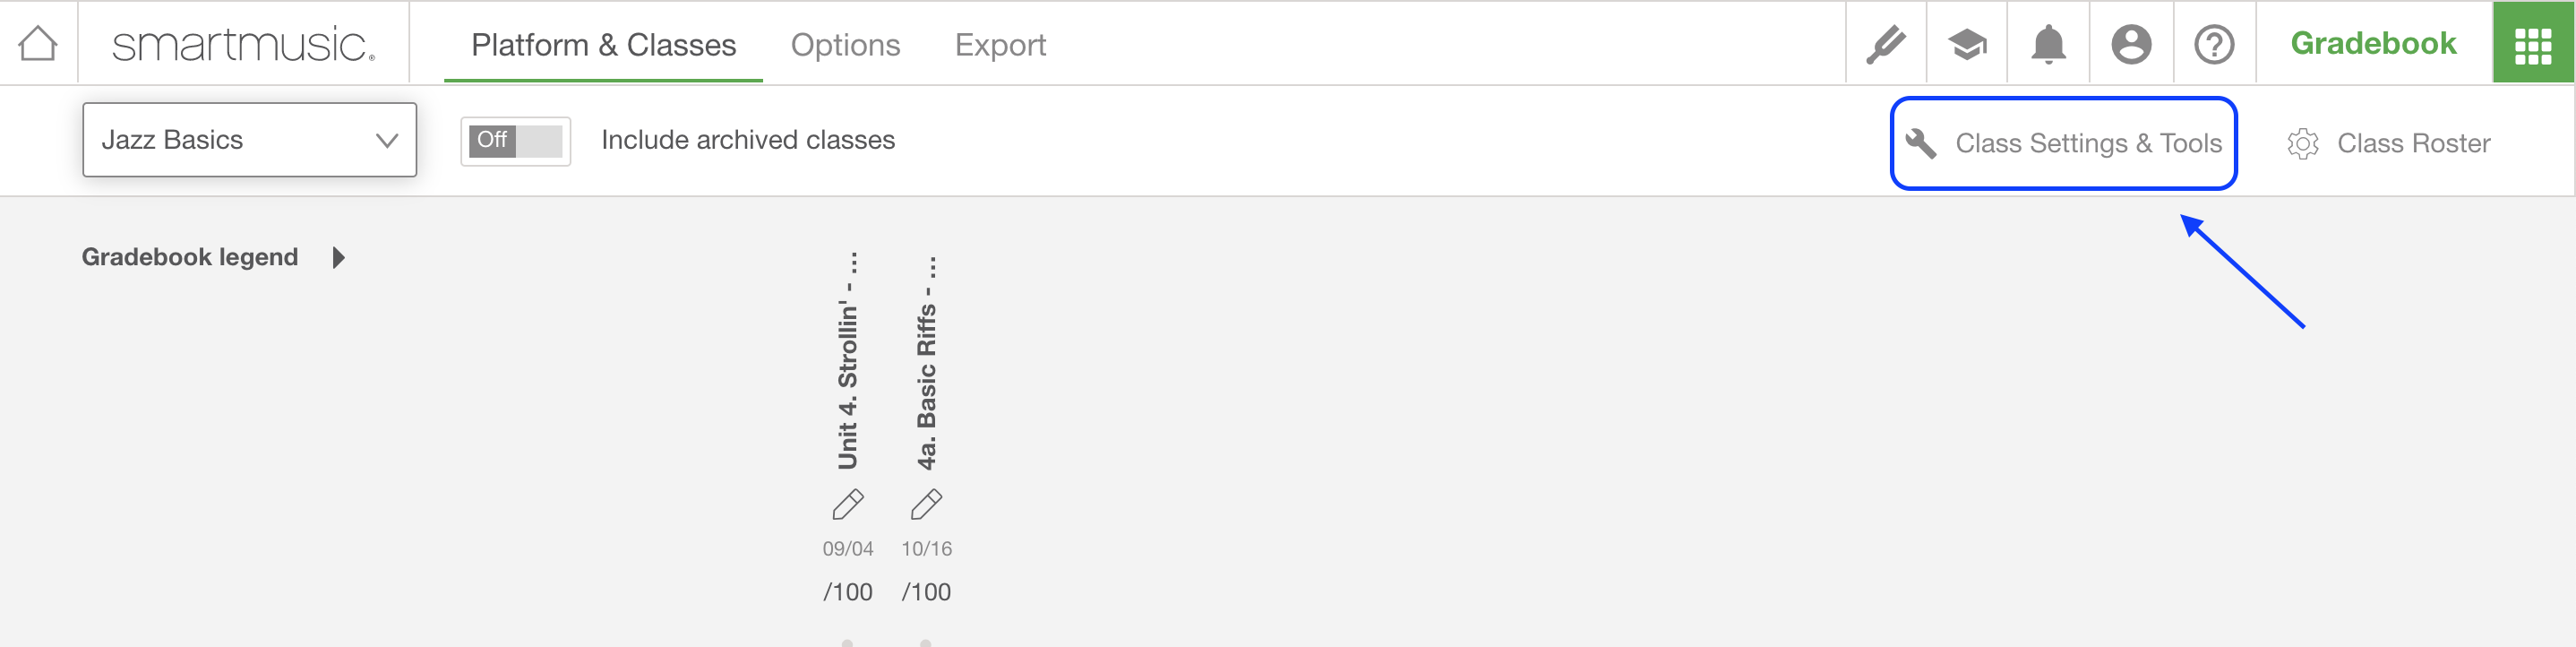
You can also get there from your Gradebook. Choose a class from the drop-down menu and then select Class Settings & Tools.
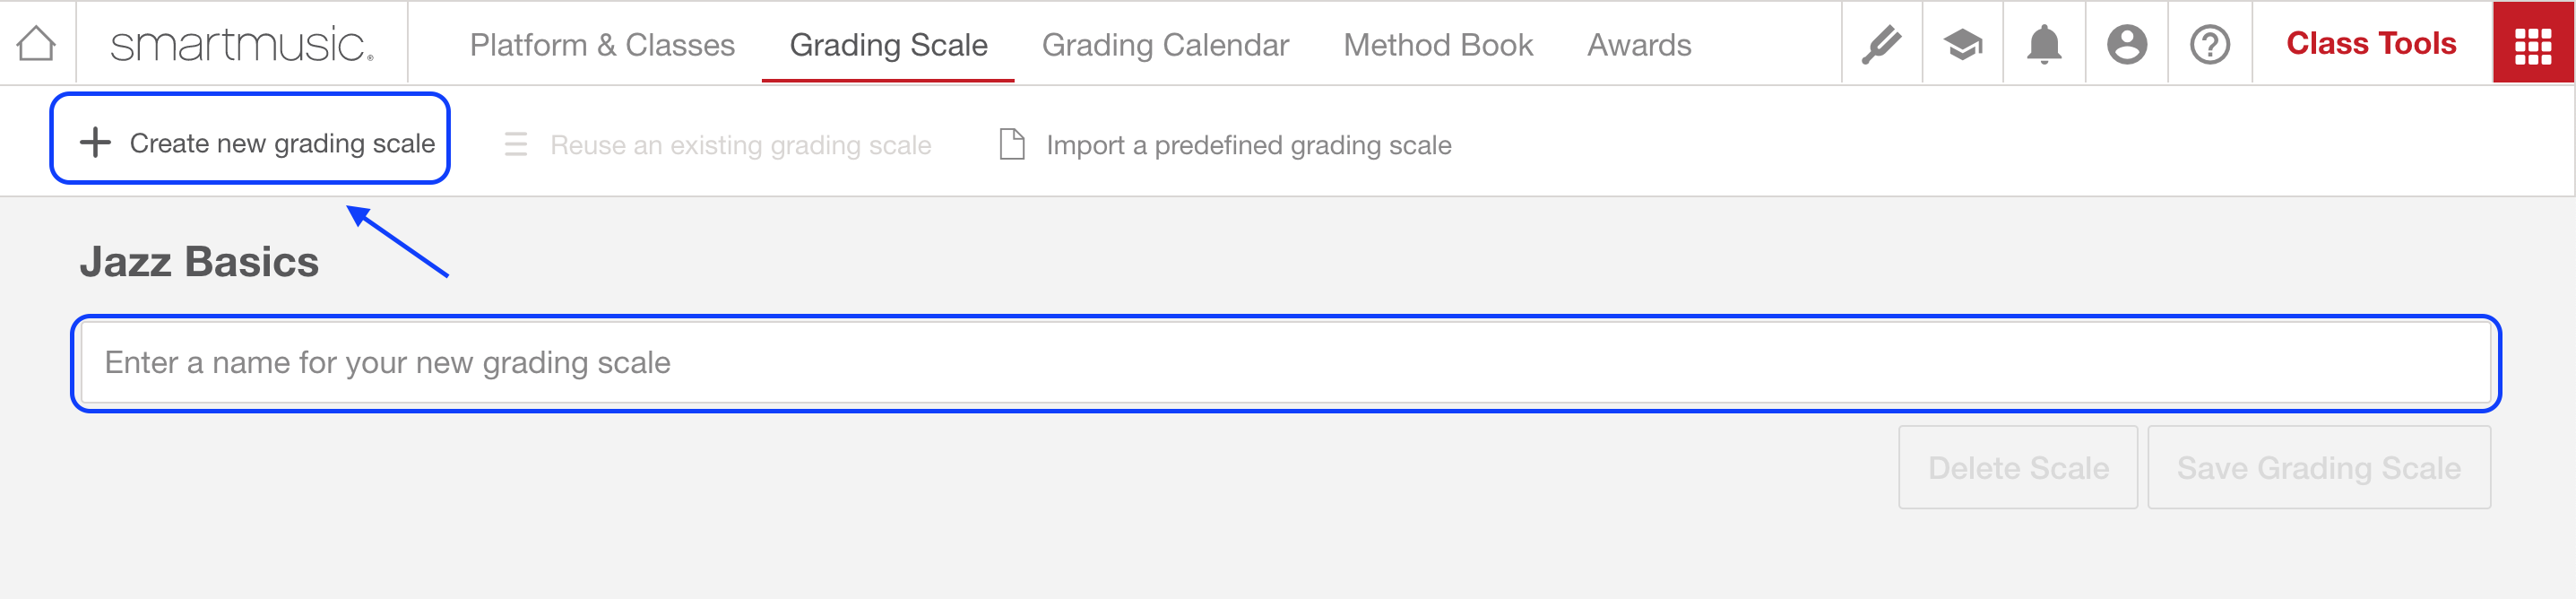
Step 2: enter a name for your Grading Scale.
The Class Tools page appears. Select Grading Scale and then select + New grading scale. Enter a Grading Scale name.
Step 3: define each grade label for your Grading Scale.
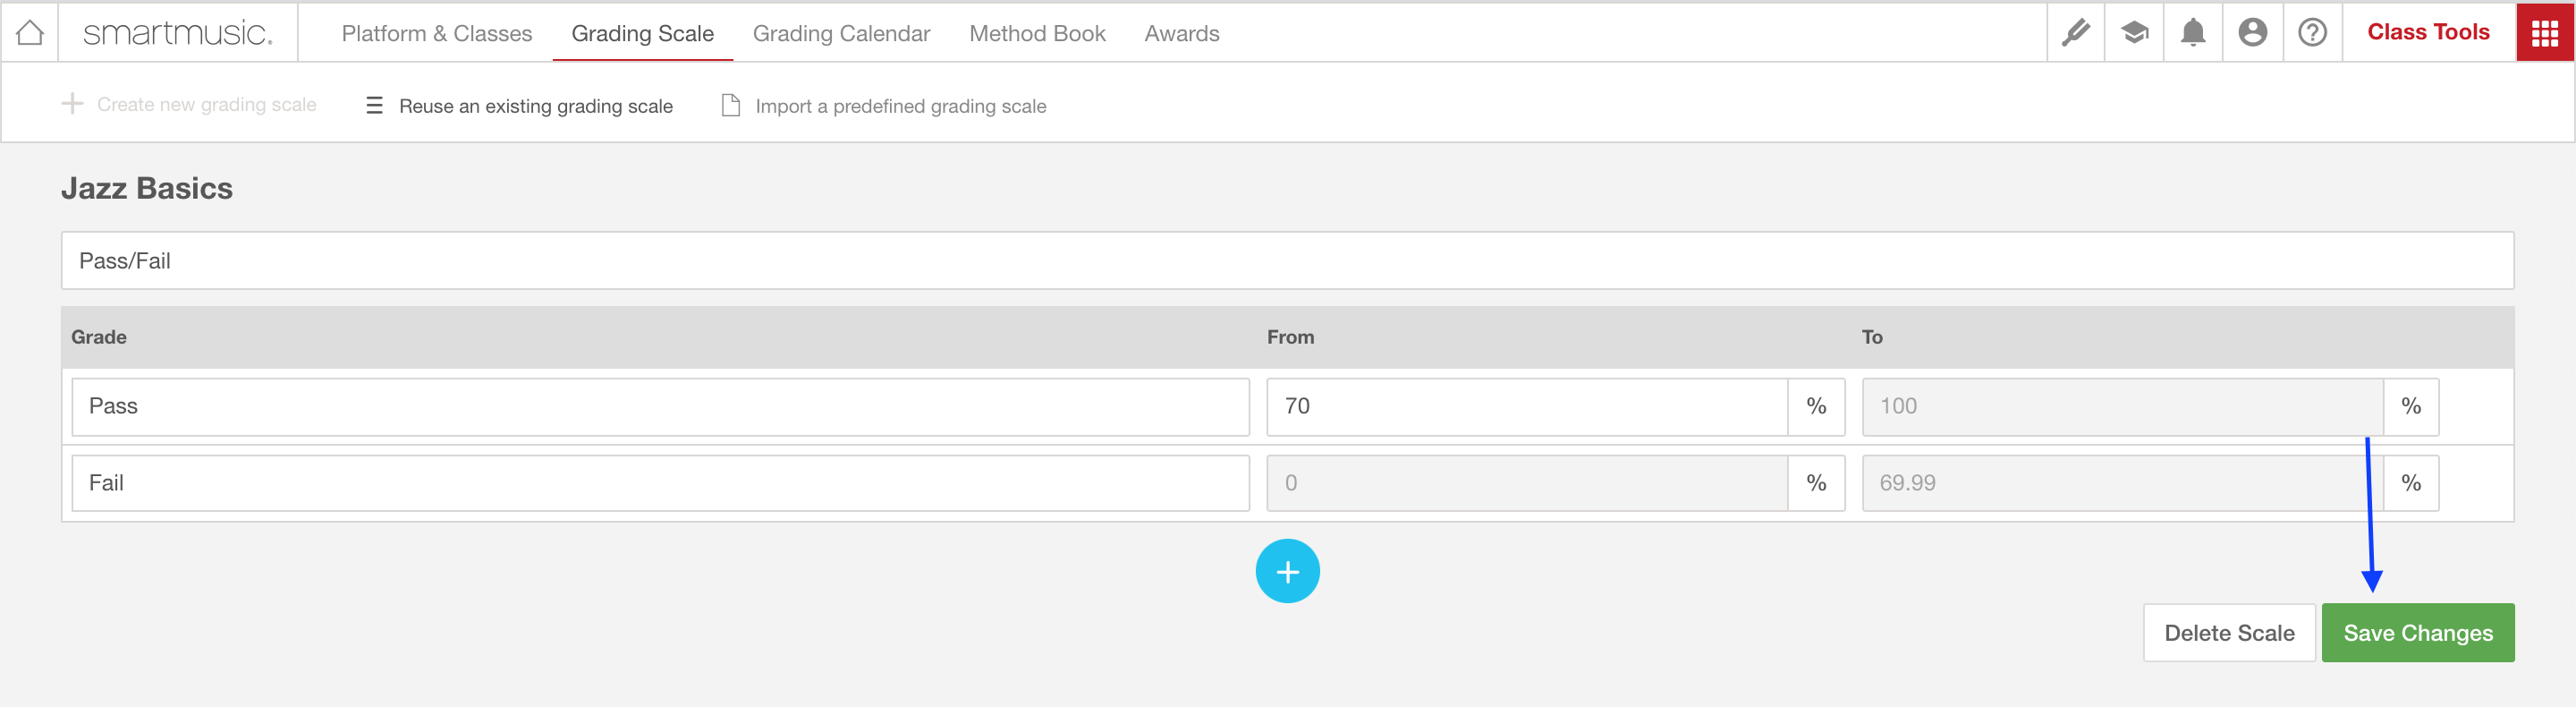
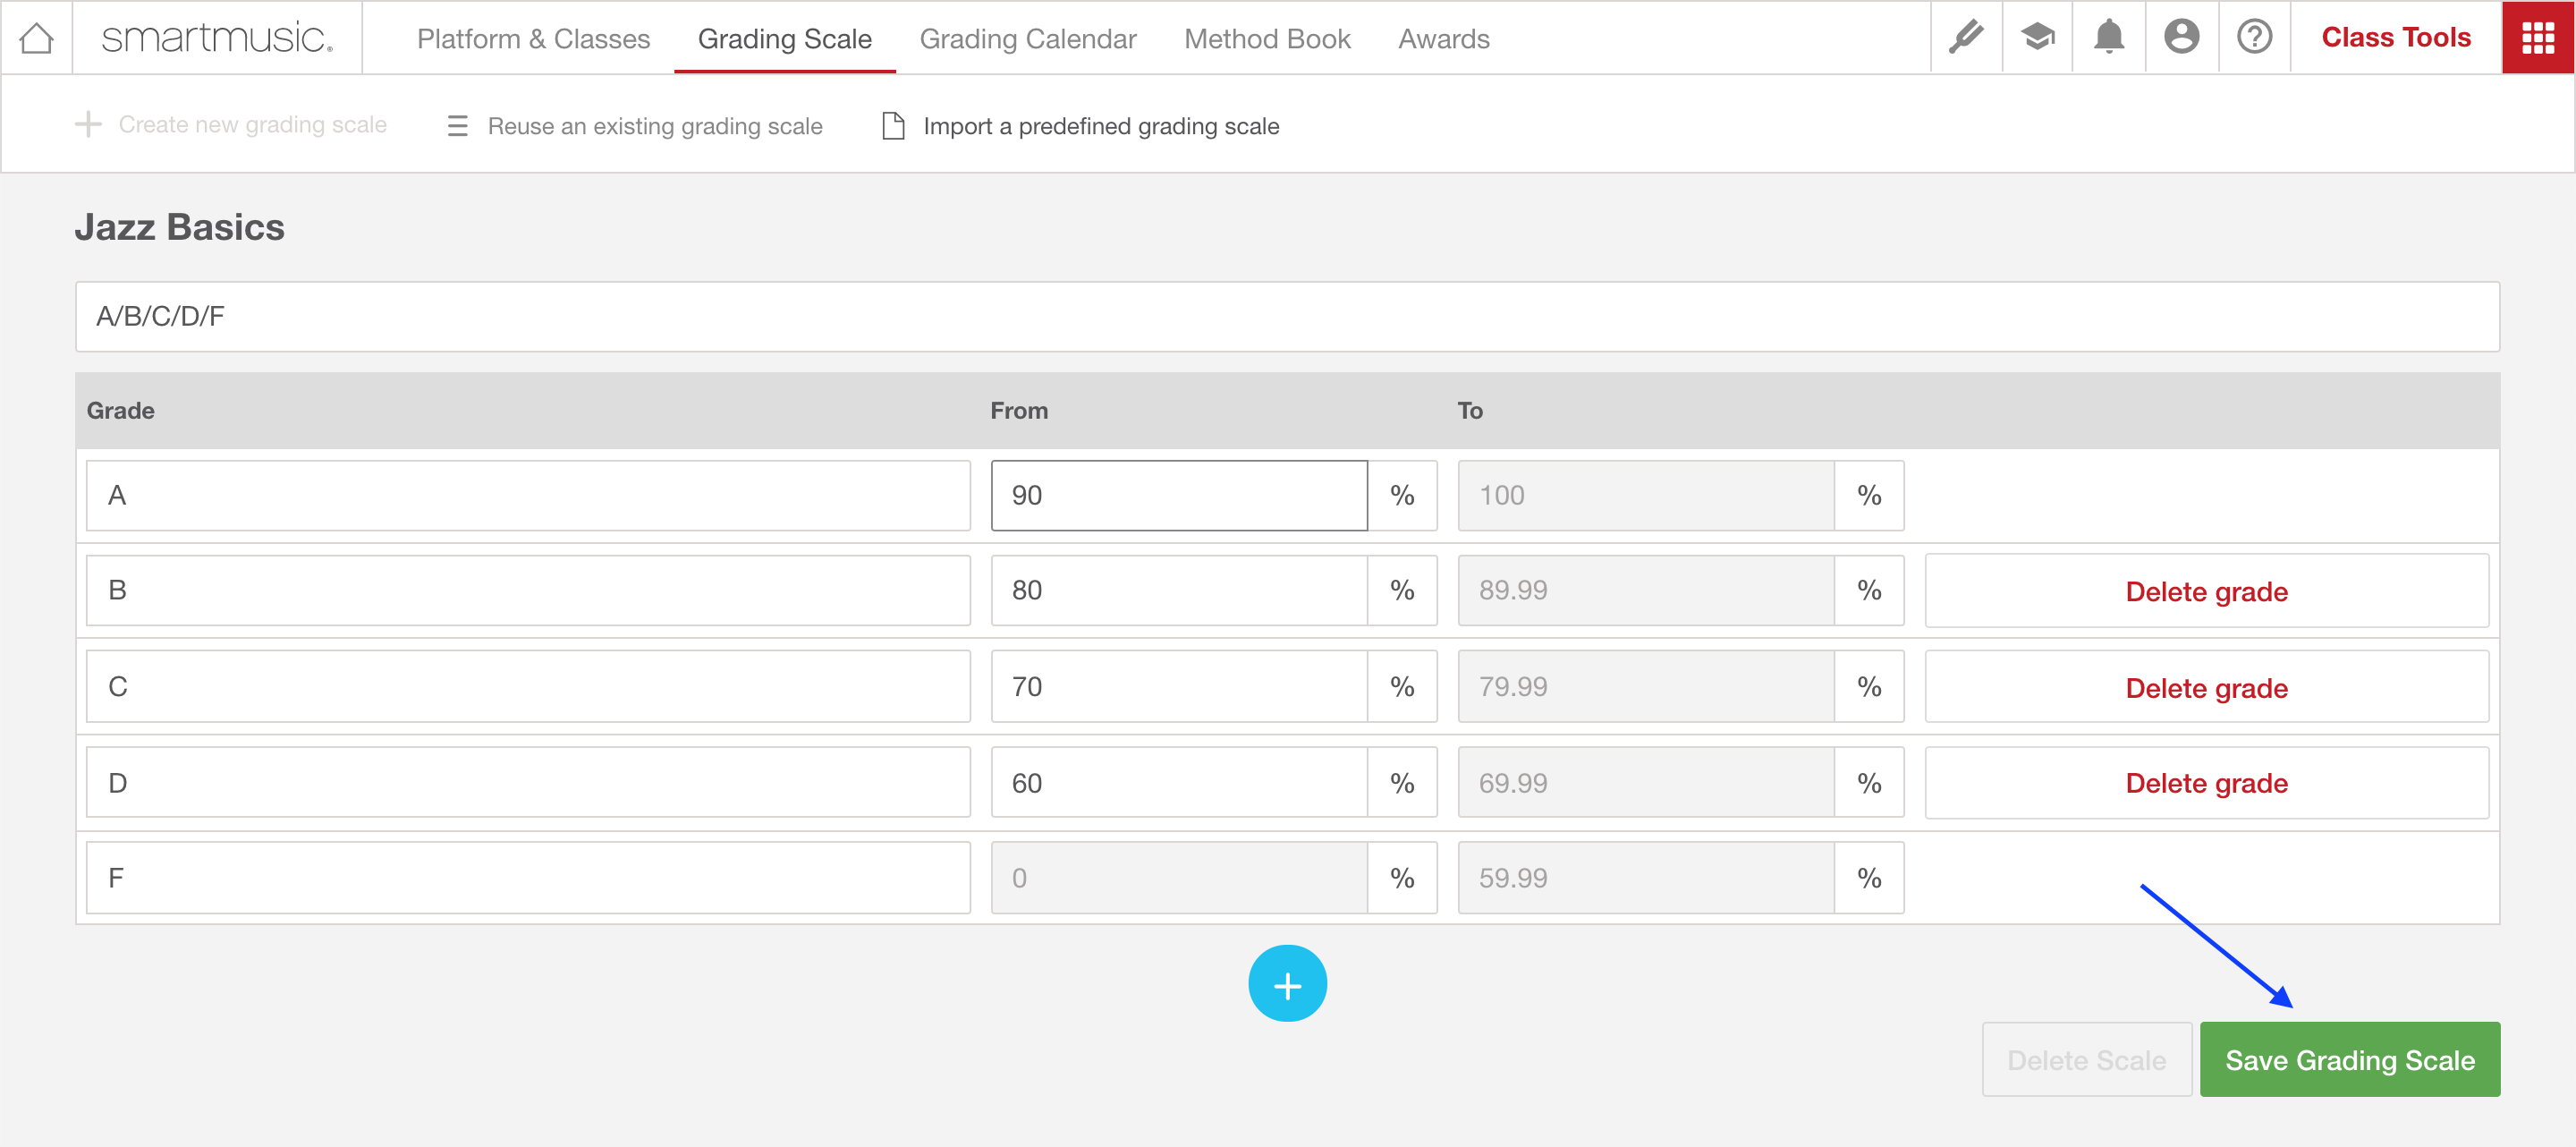
Under the Grade column, type in the first label for your highest grade (e.g. A, S, etc.). Under the From column, enter the percentage threshold for that grade (i.e. the lowest percentage with which a student can achieve the matching grade).
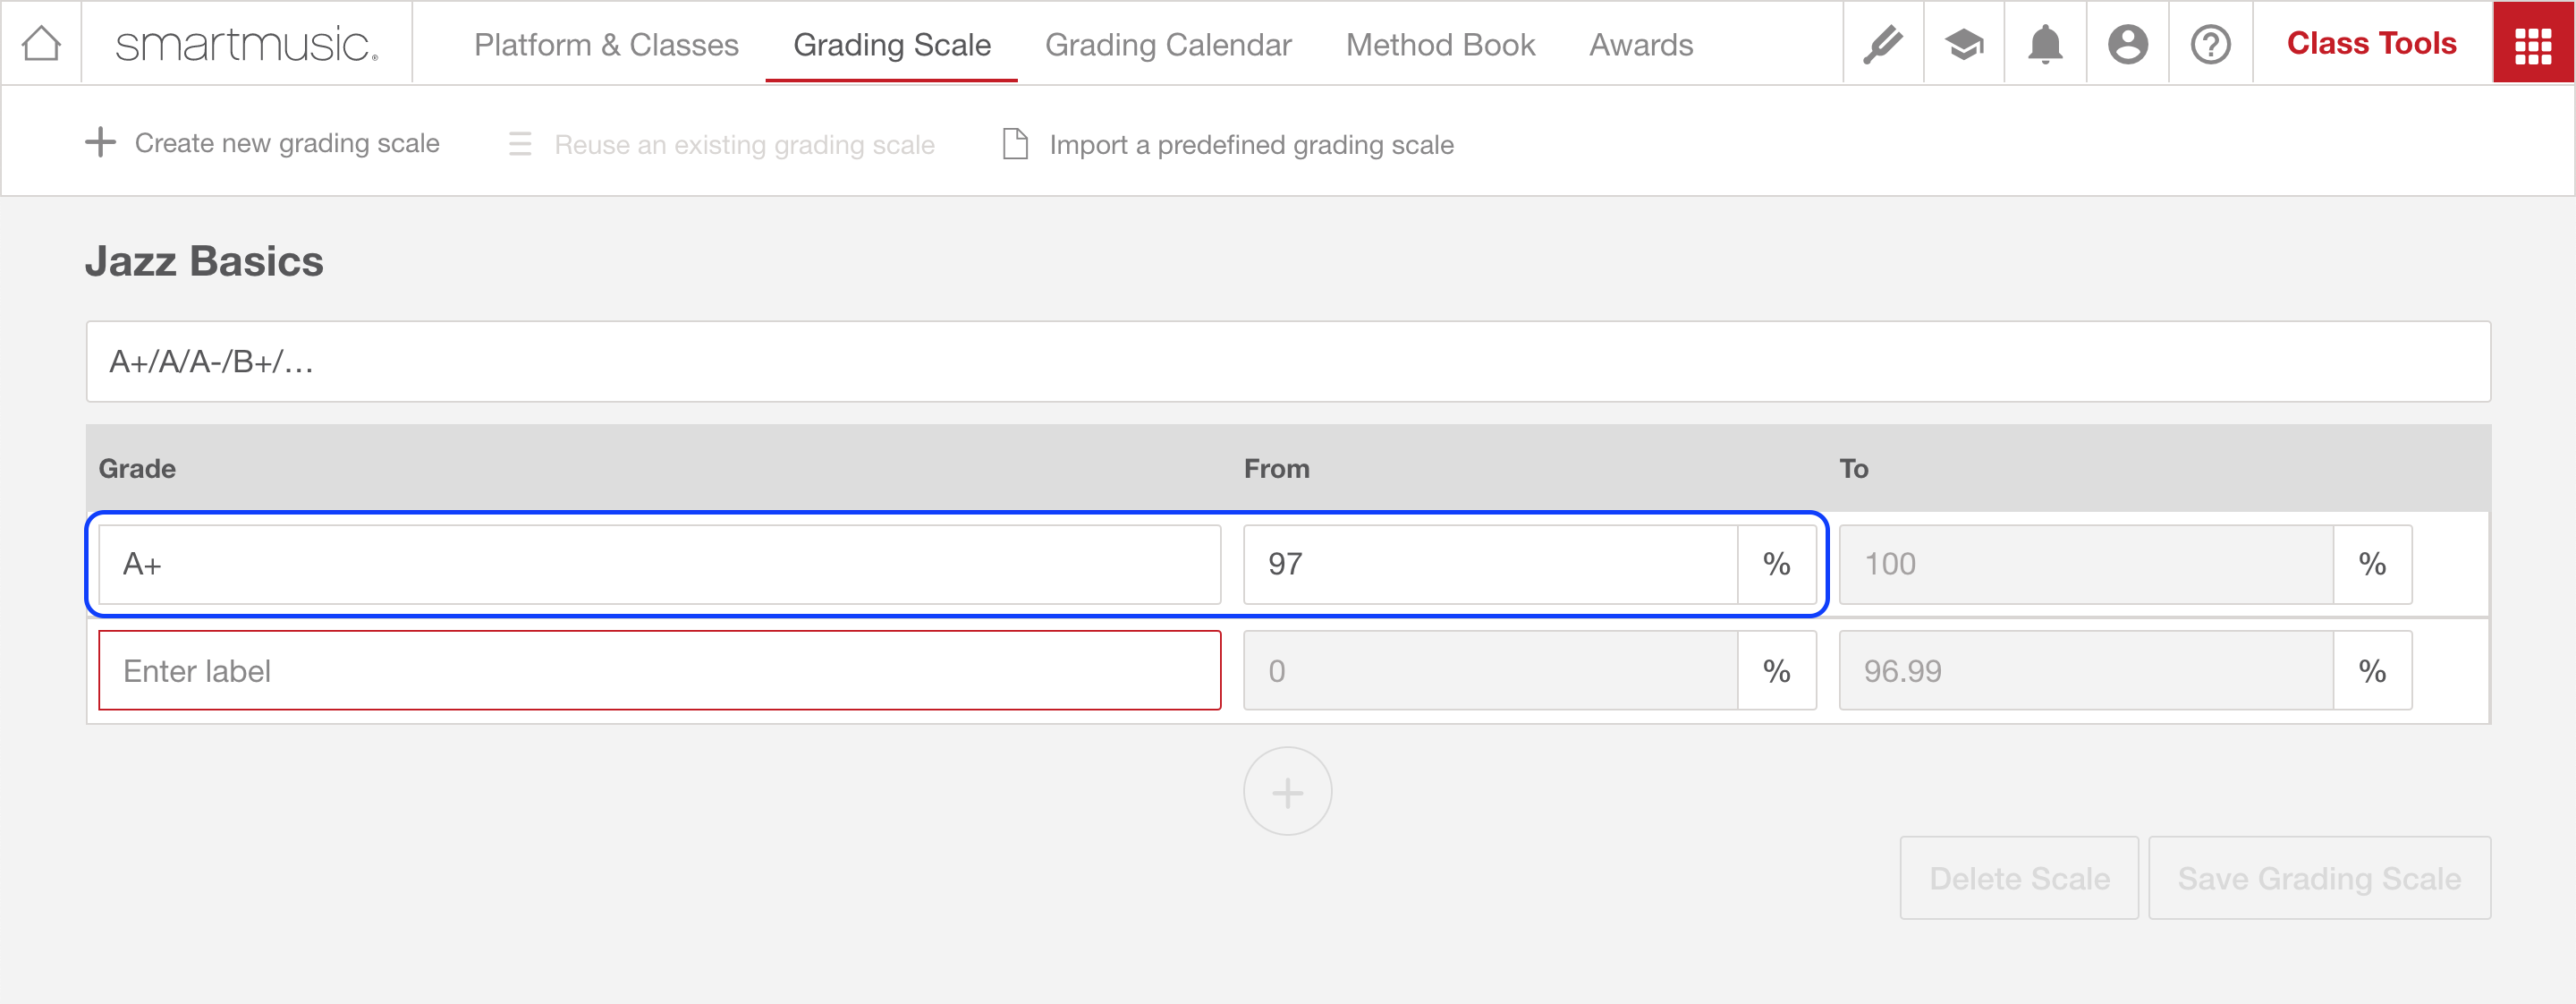
In the above picture, students that earn 97%-100% of the available points will receive an A+. Next, enter the label for your second-highest grade. If there are more than two grade labels and you need to edit the percentage threshold for your second-highest grade, select  .
.
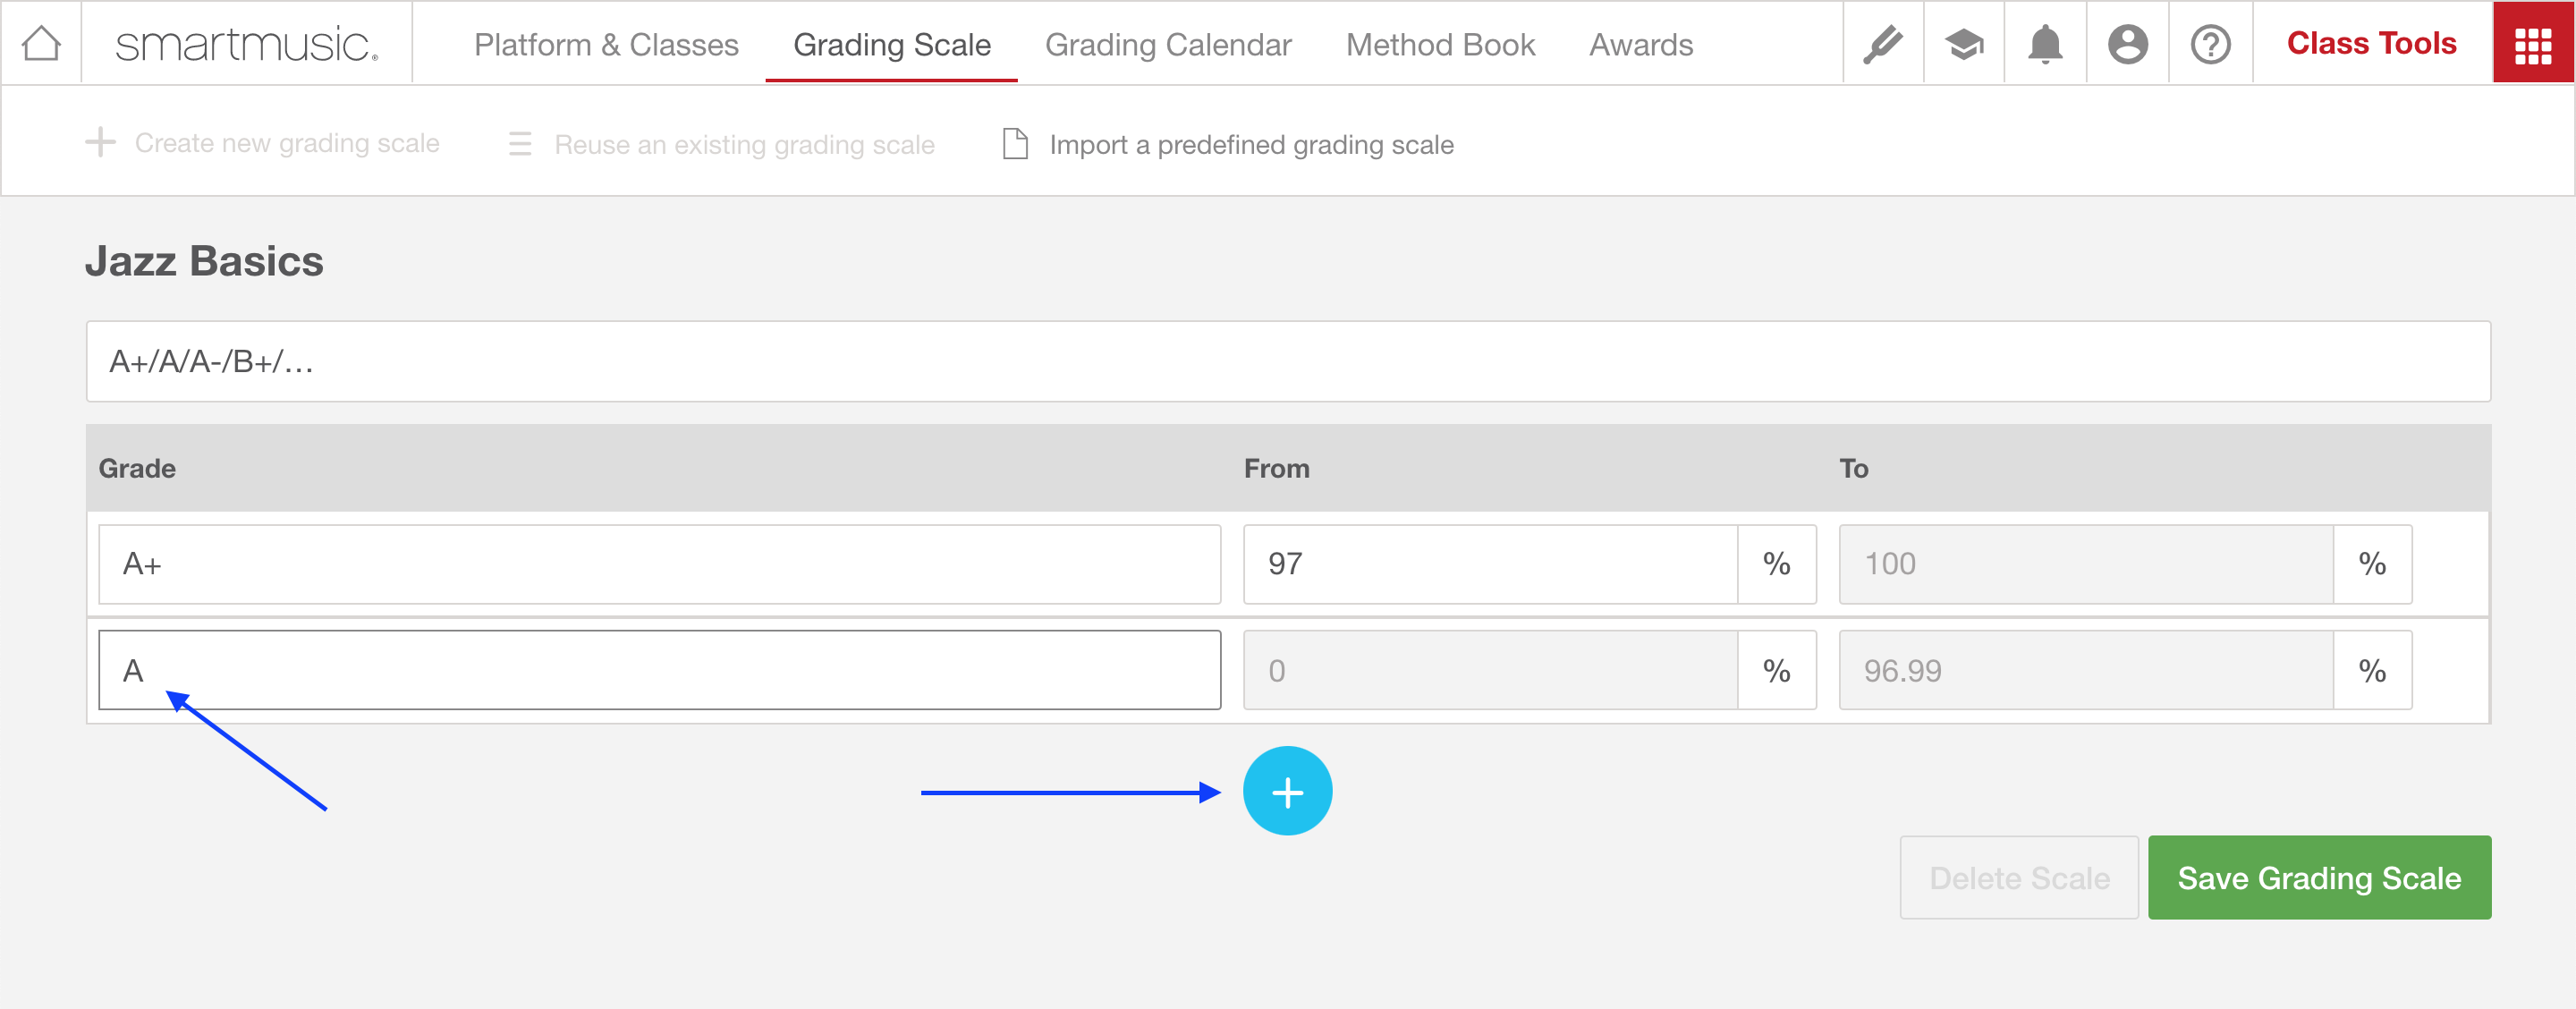
Enter the percentage threshold for the second-highest grade label, and enter the label for your next-highest grade.
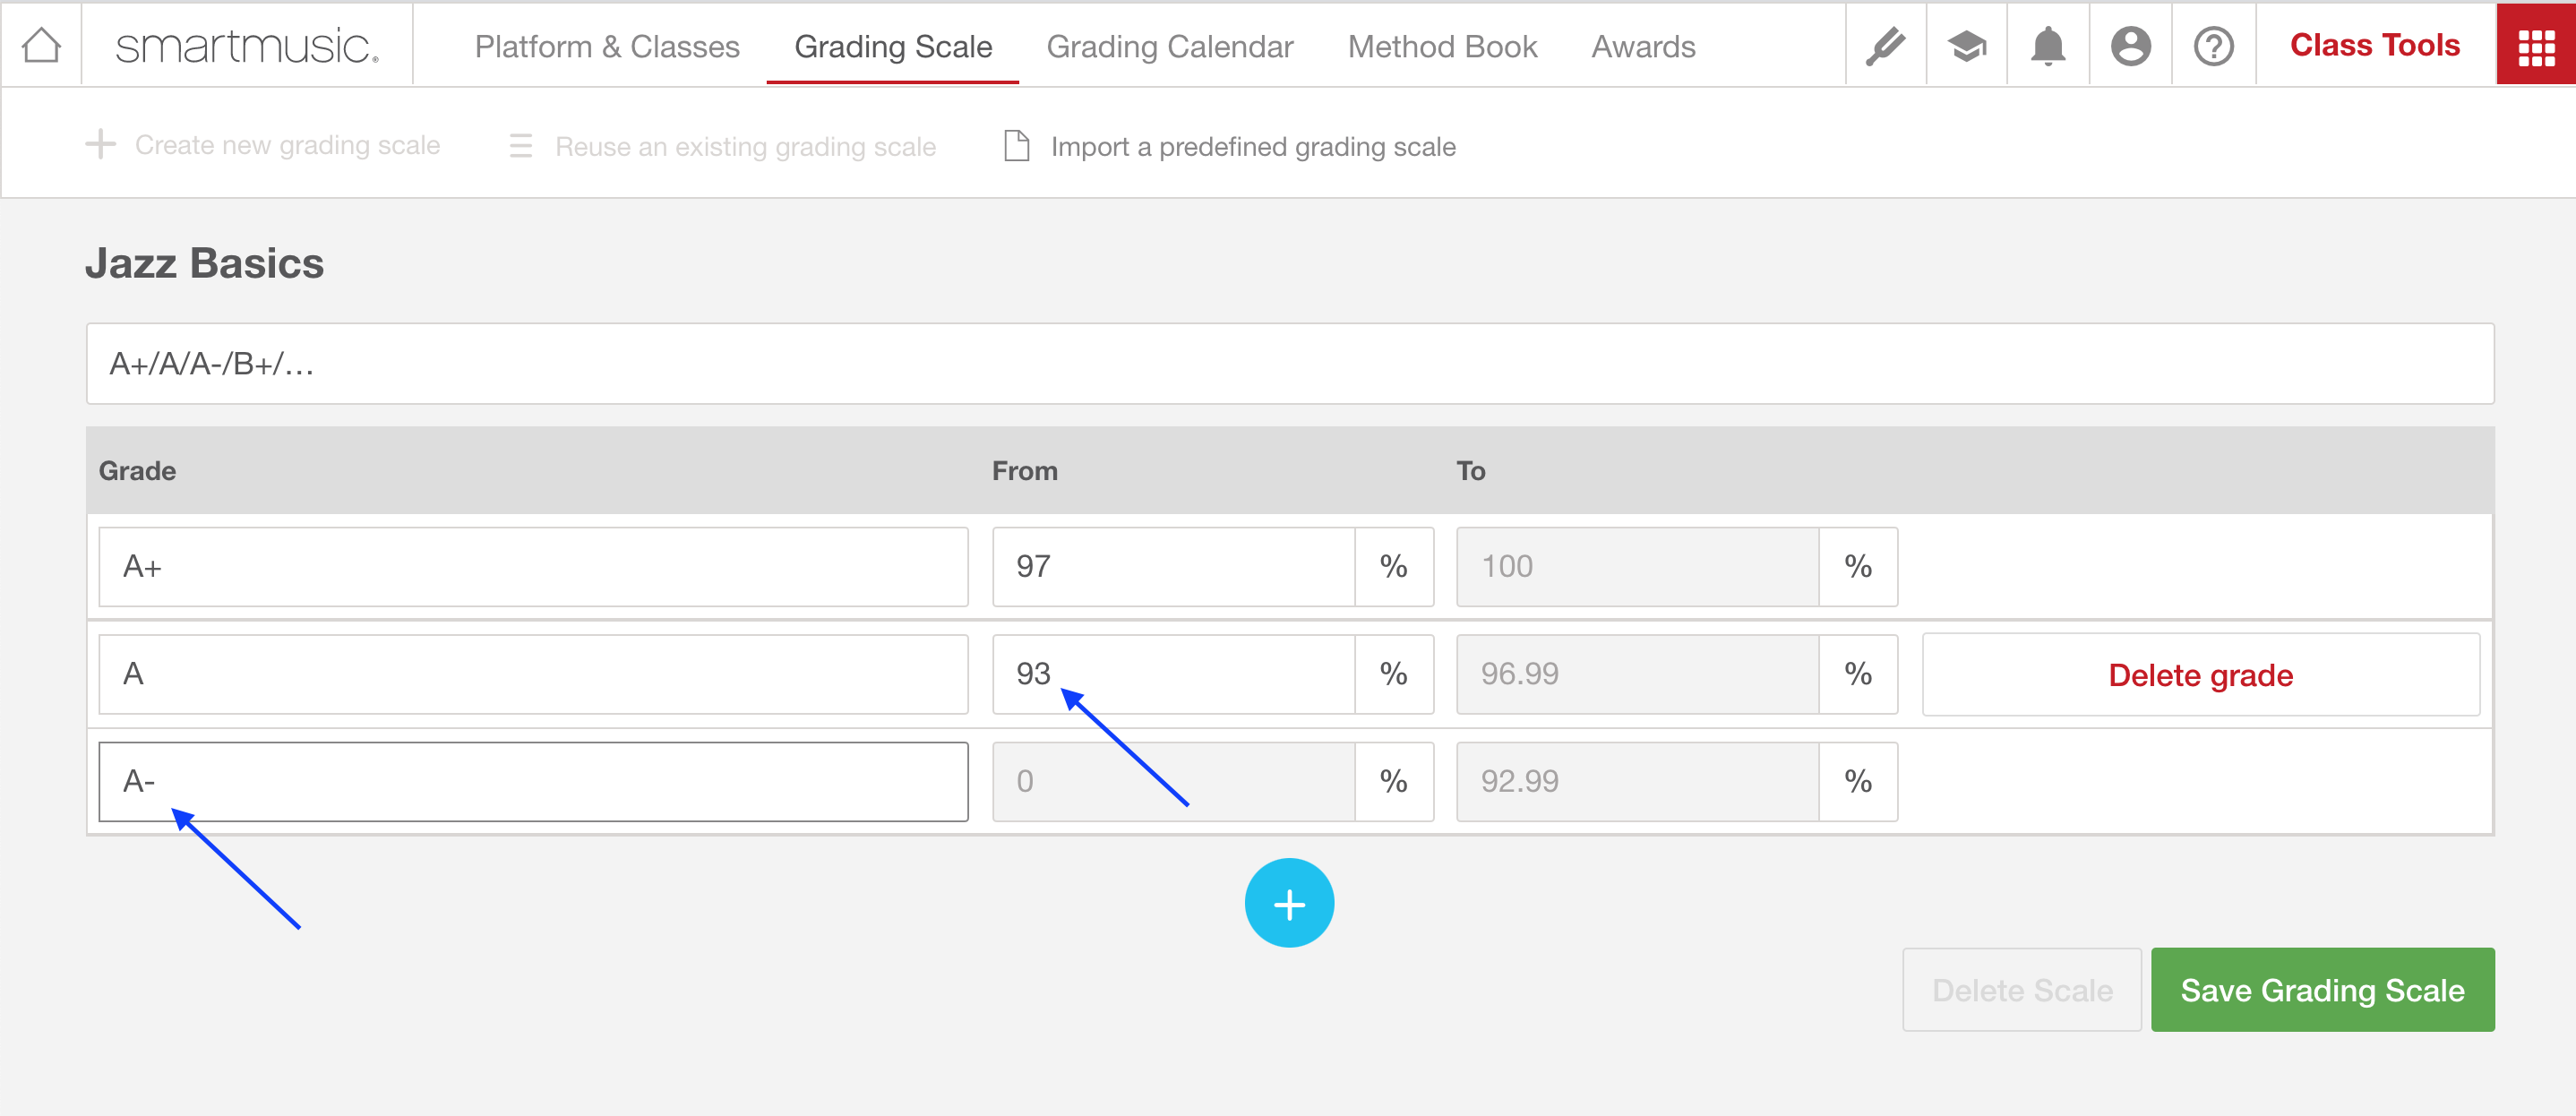
Continue in this process until your Grading Scale is complete.
Step 4: save your Grading Scale.
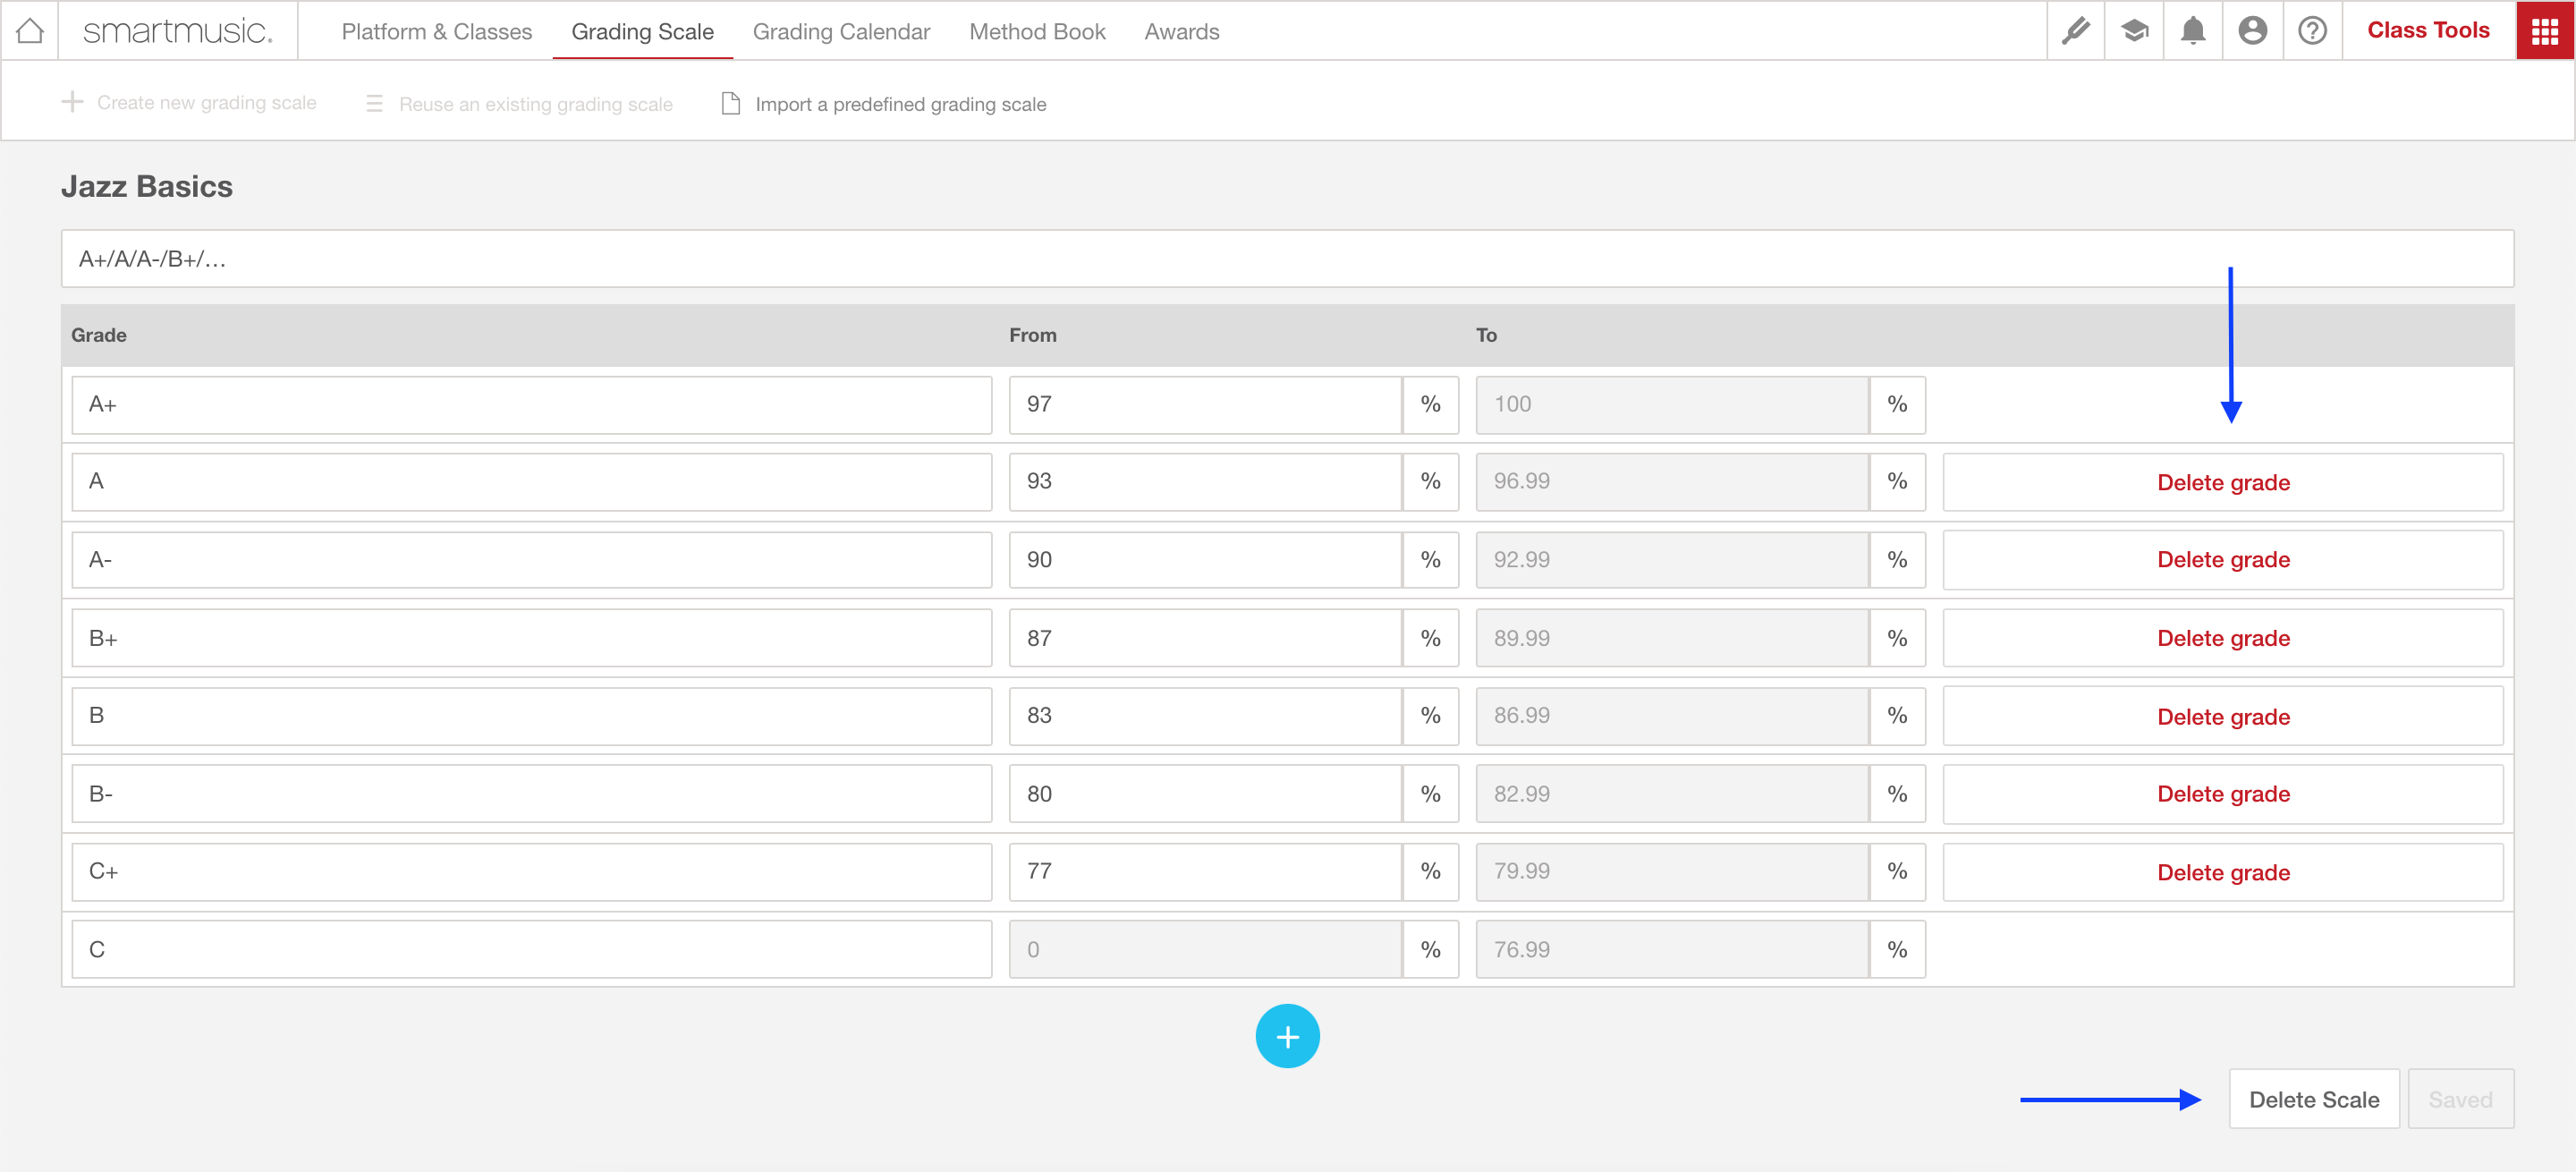
Once it is complete, select Save Grading Scale.
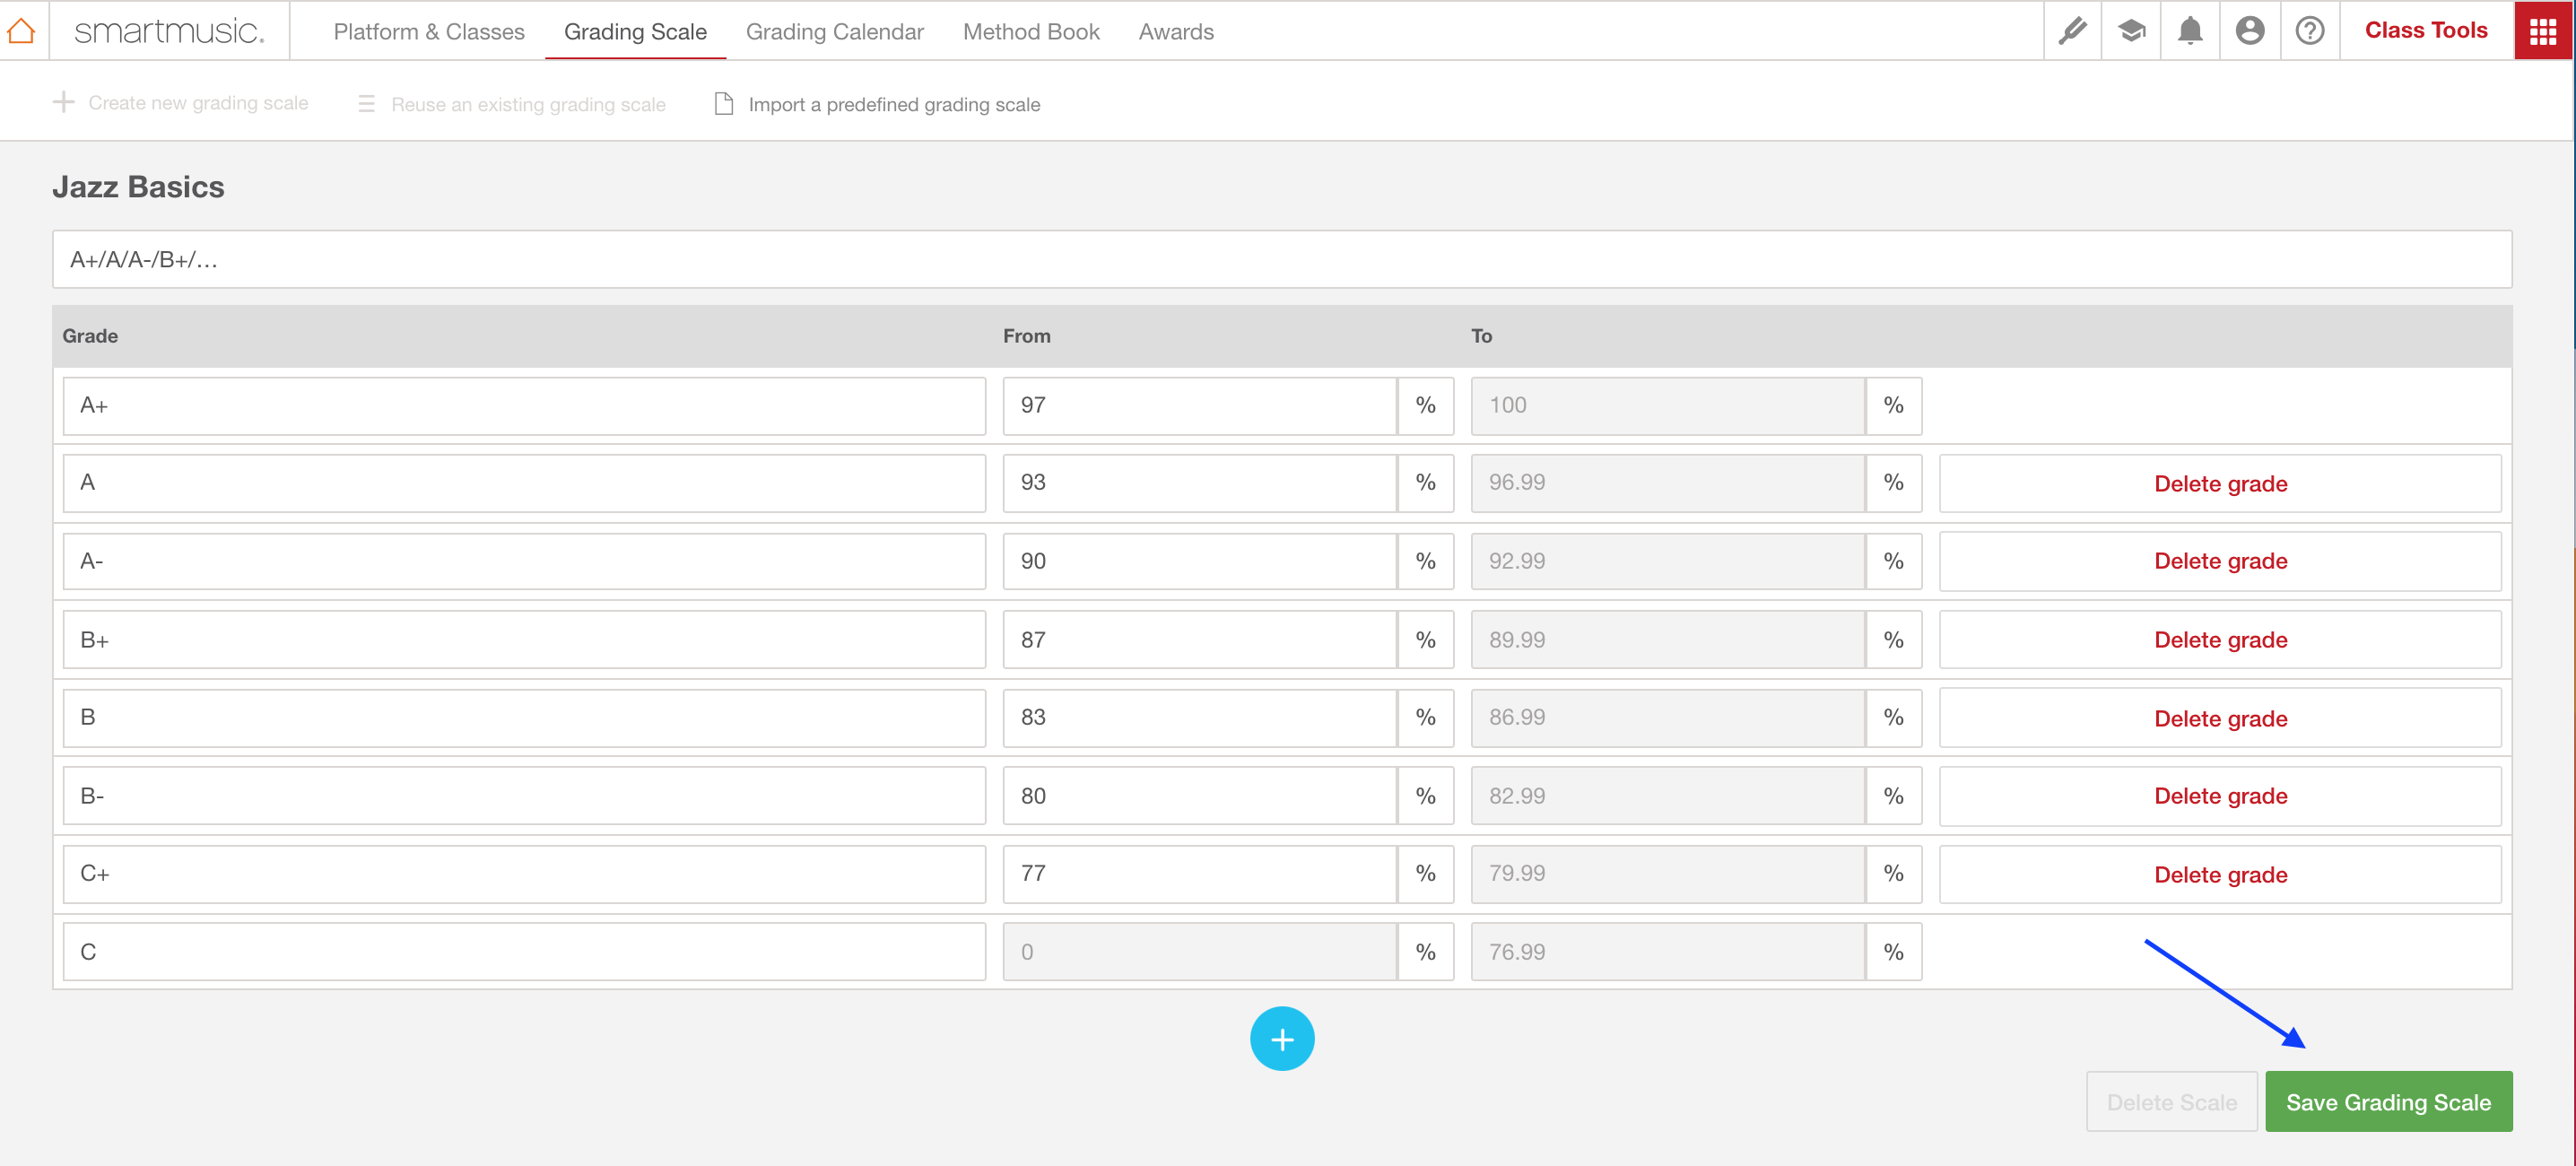
If you need to delete a grade label, select the label's Delete Grade button. If you need to delete the entire grading scale, select Delete Scale.
Step 5 (Optional): use an existing Grading Scale for another class.
After you have chosen Class Tools from the Navigation Menu or Gradebook, select Grading Scale and then select Reuse an existing grading scale. Choose an existing grading scale from the drop-down menu.

The Grading Scale appears. Select Save Grading Scale to use the Grading Scale for the chosen class.
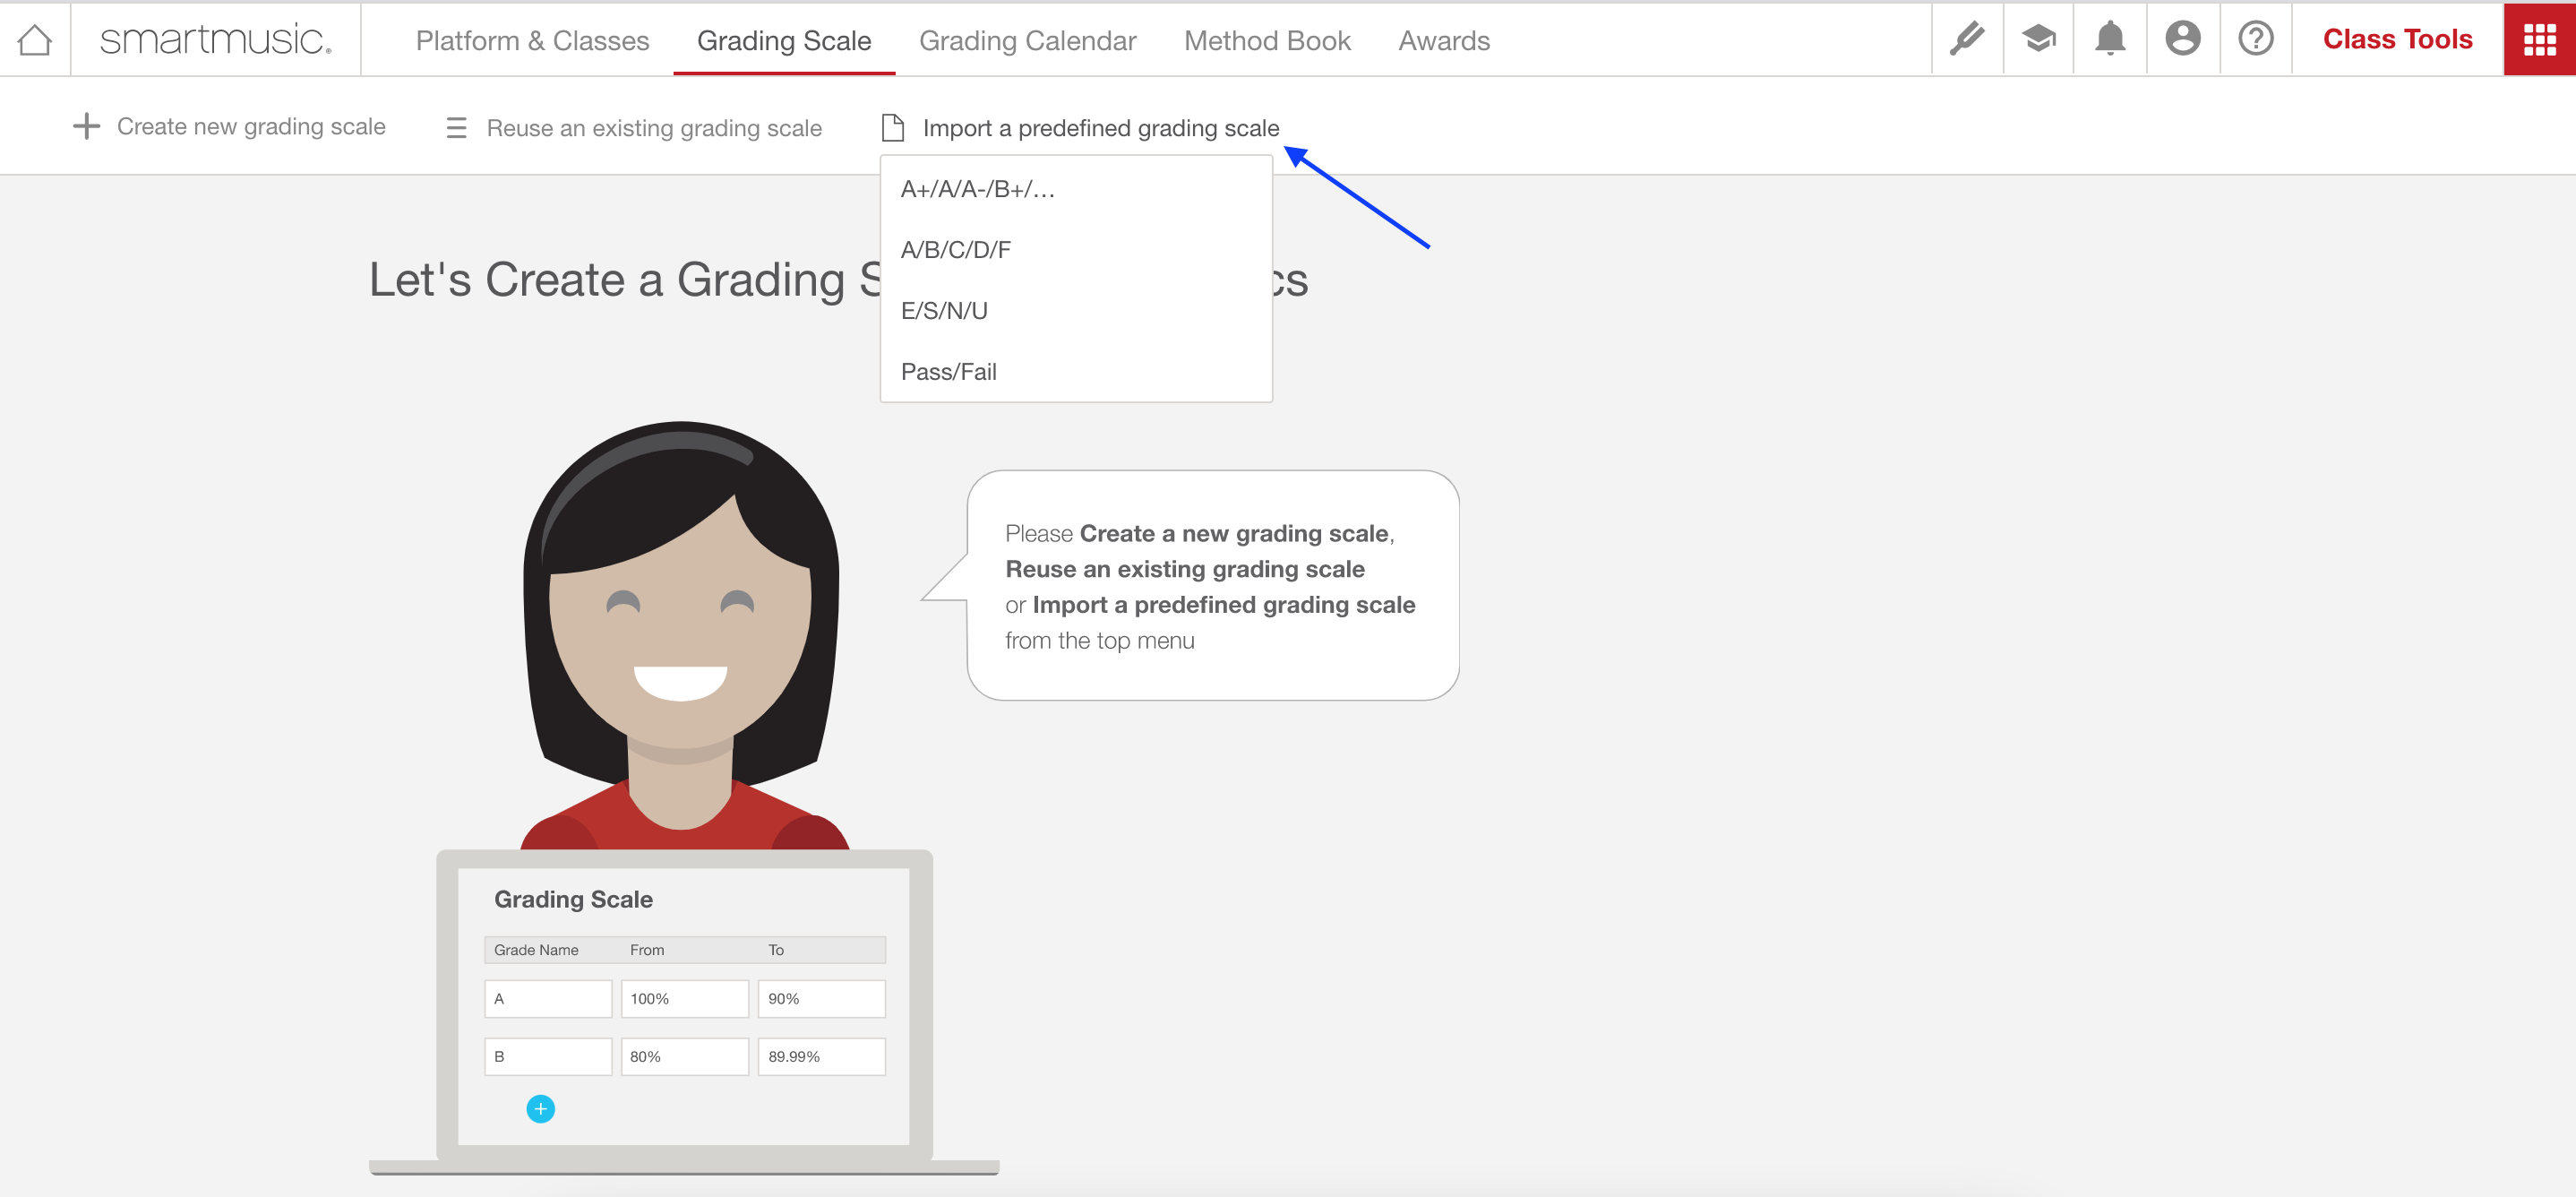
Step 6 (Optional): use a predefined Grading Scale.
After you have chosen Class Tools from the Navigation Menu or Gradebook, select Grading Scale and then select Import predefined grading scale to choose a standard grading scale.
The Grading Scale appears. Select Save Grading Scale to use the Grading Scale for the chosen class.
0 Comments